Set up YubiKey with GitHub account
Securing your online accounts is important. One of the more important security measures that users can implement, is multi-factor authentication (MFA). Aside from an authenticator app or code via email/SMS, a hardware security key is a great way to secure access to your accounts. In this guide, we will show you how to set up a Yubikey 5C NFC as a security key for your GitHub account.
Setting up a Yubikey 5C NFC as a security key for GitHub account
This guide will show you step-by-step how to set up the Yubikey 5C NFC with your GitHub account. Other versions of the YubiKey are set up in a similar manner, but the steps might differ slightly. In these cases, please refer to the offical YubiKey documentation for the correct steps for your type of YubiKey.
YubiKey
What is a YubiKey?
A YubiKey is a hardware security key - a form of hardware authentication in which you prove that you are who you claim to be by providing a YubiKey linked to your account. The YubiKey can be used with your USB-A, USB-C or NFC-enabled devices, depending on the type of YubiKey you possess. It is a small device that can be carried on your keychain, so you can always have it with you for authentication purposes.
Why is it worth using?
The benefit of using a hardware security key over other means of multi-factor authentication, is that it is more secure. Unlike an authenticator app or code sent via email/SMS, it is not susceptible to phishing attacks. This form of authentication using a physical item is thus more secure and hardened. It is, however, still vulnerable to being stolen or forgotten at home - so be warned.
Securing your GitHub account
Why would you want to do this?
For users of GitHub (developers, code-enthousiasts, etc.), GitHub accounts contain a variety of information. Not only does it contain your source code, but it might also contain some secrets (or many, depending on your security practices). Seeing as how it also contains your private repositories, which are probably private for a reason, your GitHub account is a great target for some enhanced secutiry measures.
Setting up the YubiKey as a security key
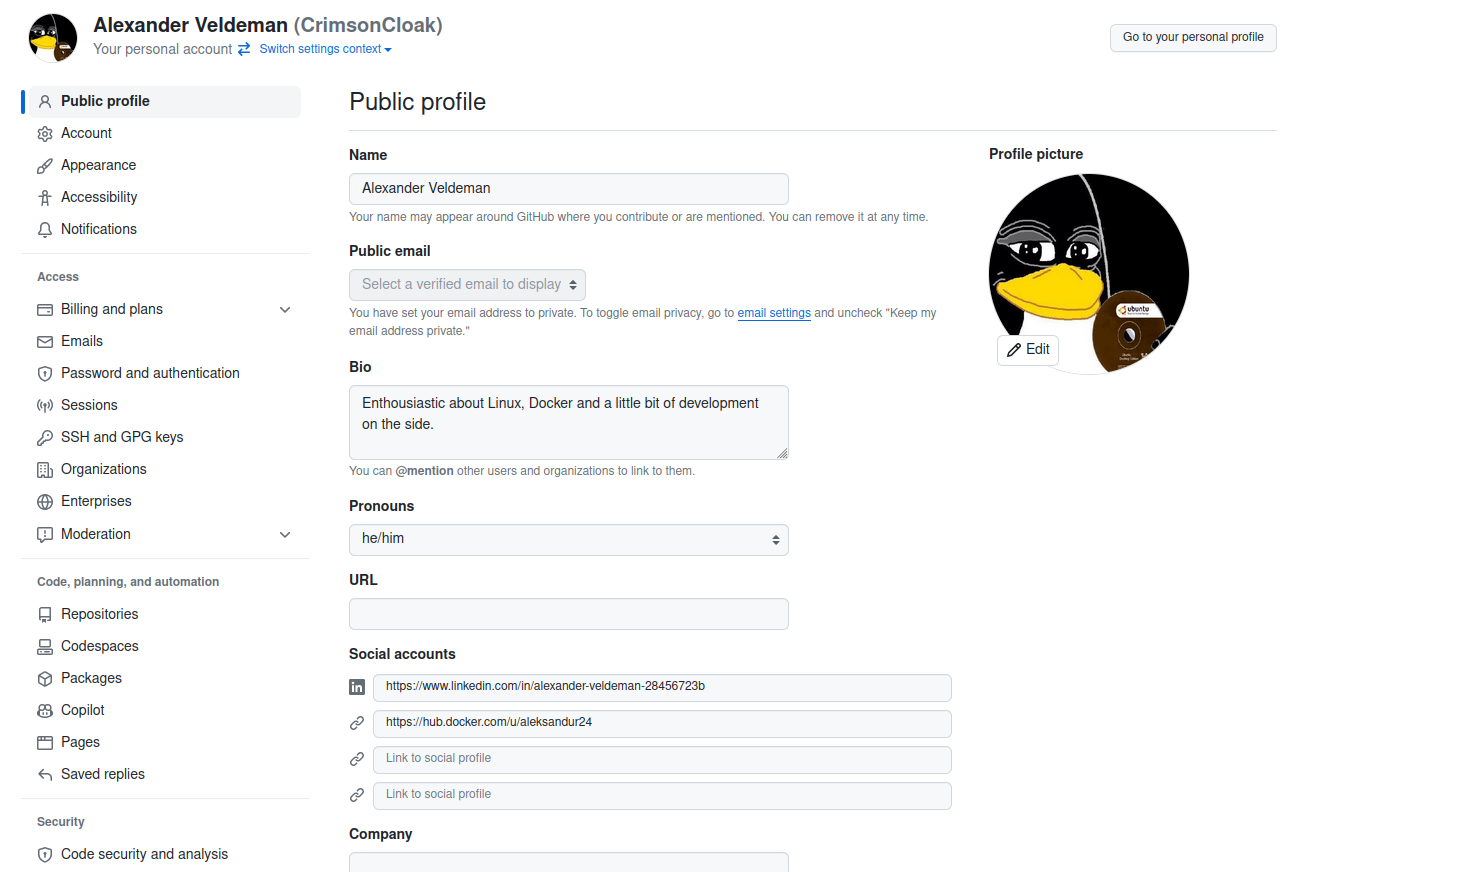
1. Go to your GitHub account settings
First, we need to add your physical hardware key to your GitHub account. Navigate to GitHub and log in to your account. Once you have logged in, navigate to the your account settings, where you can see the following information:
2. Navigate to the “Password and authentication” tab
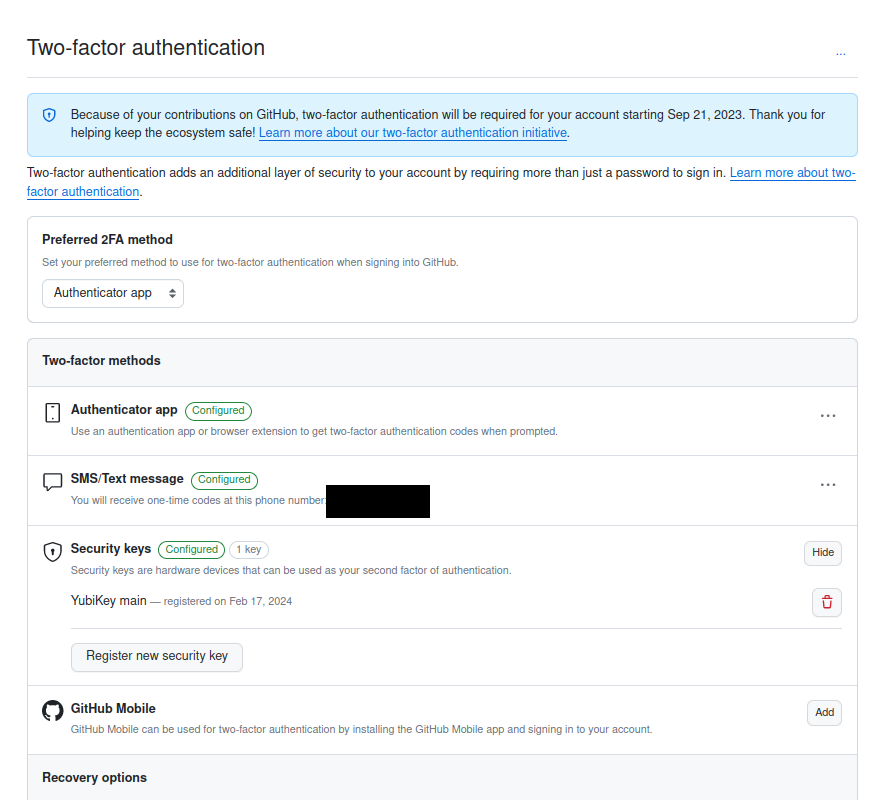
On the left-hand side of your settings, onder the “Access” header, you will find the “Password and authentication” tab. Navigate to it, then scroll down to the Two-factor authentication section
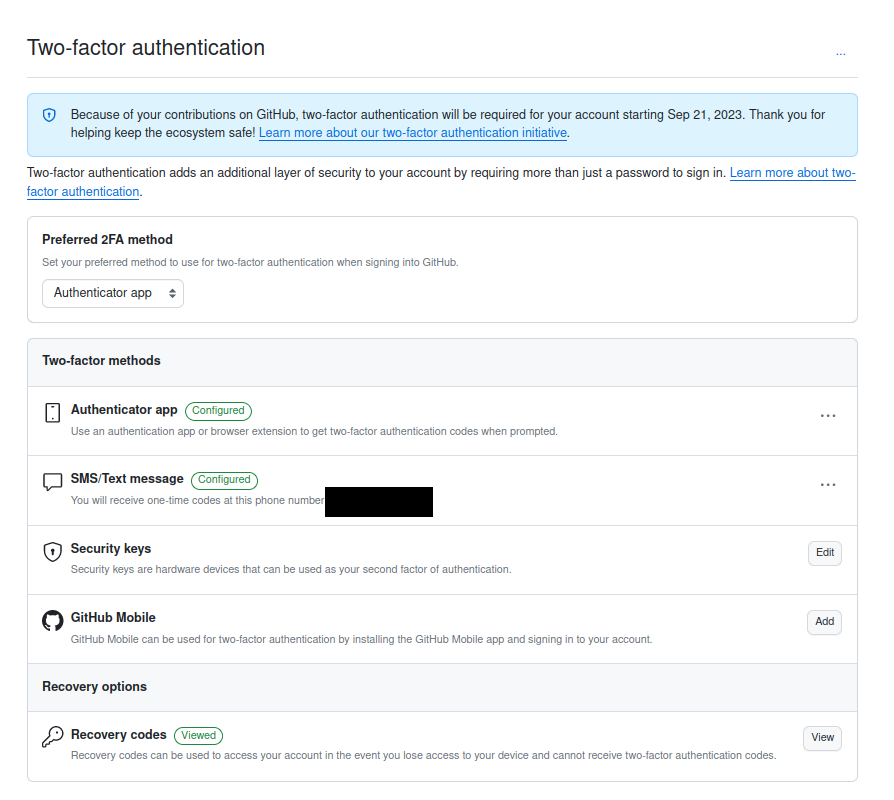
3. Add a new security key
In the Two-factor authentication section, you will find the option to edit a security key. Click on the “Edit” button to add your first security key to your account. After clicking the “Edit” button, you can click the “Register a new security key” button.
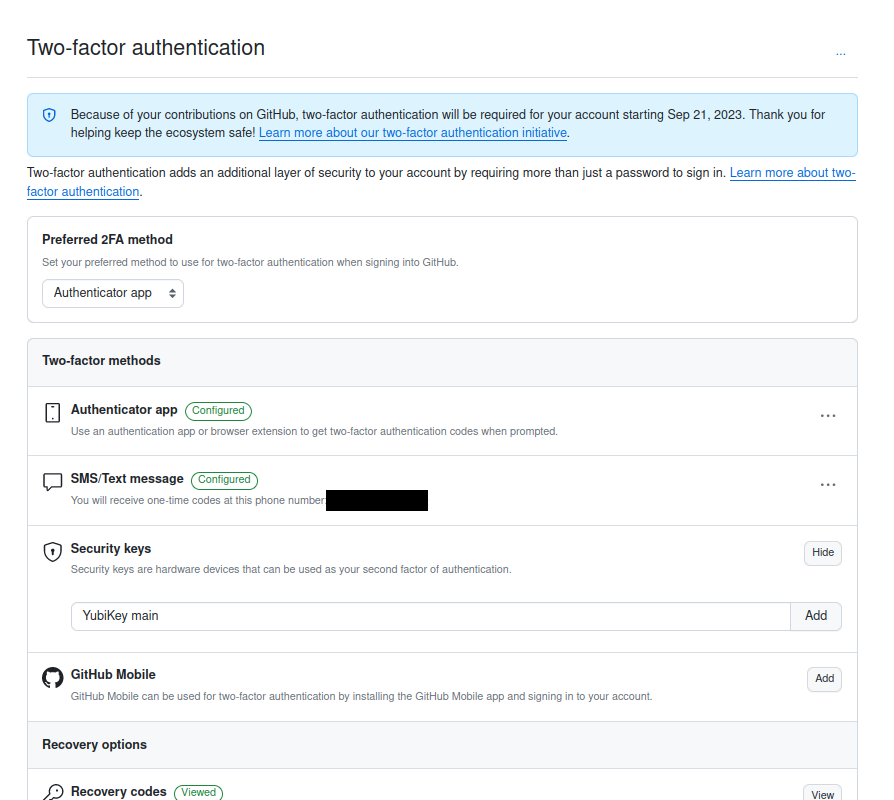
4. Insert your YubiKey and tap it
Once you have clicked the “Register a new security key” button, chosen a descriptive name and have pressed the “Add” button, your browser will prompt you to touch your security key. 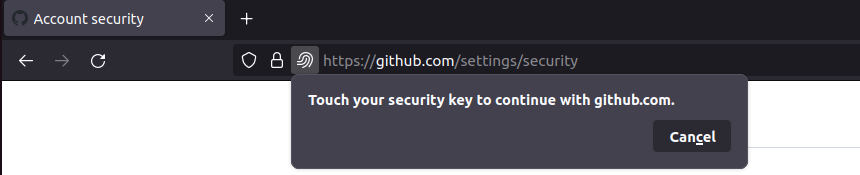 Insert your YubiKey into your device and press the button on the key to link your YubiKey to your account.You can now also see your YubiKey in the list of security keys on your account!
Be sure to also select “Security keys” as your preferred 2FA method in this tab if you always want to be prompted for your hardware key, should you have any other forms of 2FA implemented..
Optional: adding another secondary YubiKey
You might be wondering: what happens if I lose my YubiKey? For reasons of redundancy, you can have a secondary YubiKey that is also linked to your accounts in case of damage, theft or loss. You can add a secondary YubiKey in the same tab as where you added your first YubiKey, using the same steps we performed for the first key. Be sure to name your keys accordingly, so you can identify which name corresponds to which key!